Disk quota exceeded in WordPress simply means that your disk space is full. The first thing that you might think is that “I need to upgrade the disk space”, right? Well, that’s not always the case.
There are a few other reasons why you might see the “Disk quota exceeded” error in WordPress.
In my experience, I had a similar issue with my client’s website. So, this guide will show you how I fixed the issue and how you can do it too. Relax, there are good chances that you won’t have to upgrade the storage.
There are a few small things that you can do to decrease disk usage without deleting any important files. The guide will tell you everything you need to know about it. It has a step-by-step solution to solve and fix this issue.
So, let’s proceed with the guide and see how you can get more disk space. We will start by understanding the error.
What is the Disk quota exceeded in WordPress?
This error might occur if there is a server limitation imposed on the user’s account. This is mostly due to the hidden files using a lot of space.
In most cases, the error is related to hosting. However, you can surely try turning on the debugging mode in WordPress.
Just add the following line in wp-config.php.
define('WP_DEBUG', true);
The debug log is saved at /wp-content/debug.log. You can then try uploading an image. It will show the error saying disk quota is exceeded. You can definitely check out the error log and see if there is something that you need to worry about.
If it tells you that there is no space left, you can carry on with this guide and we will see some of the best ways to fix the disk quota exceeded error with ease.
Method #1: Increase user quota allocation in the cPanel server
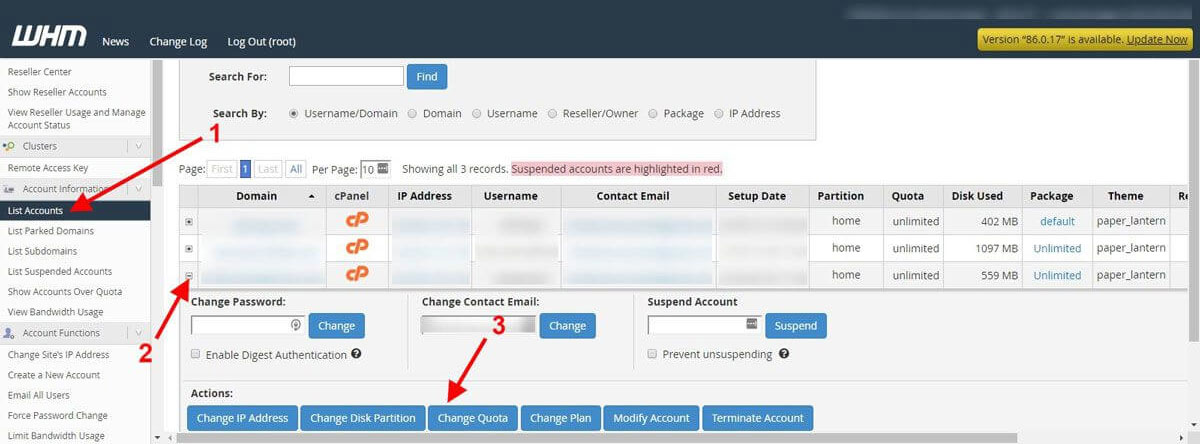
This is the most common issue that is responsible for the error. If you are using VPS, you can change the user quota allocation in the WHM settings.
You can simply head over to List Accounts and then click on the domain where you want to increase the quota.
Please note that if you are getting the same error when you are receiving an email, you need to increase your email quota.
There are two ways to increase your email quota.
- You can head over to Email accounts in WHM and increase the quota from there.
- On the other hand, if you are using cPanel, you can simply head over to email accounts and change the quota from there. You will see the edit icon from which you can change the settings including allocated storage for that particular email address.
Method #2: Free up space
Now, if you are not using a VPS or the above method isn’t useful for you, there are still other ways for you to free up some space.
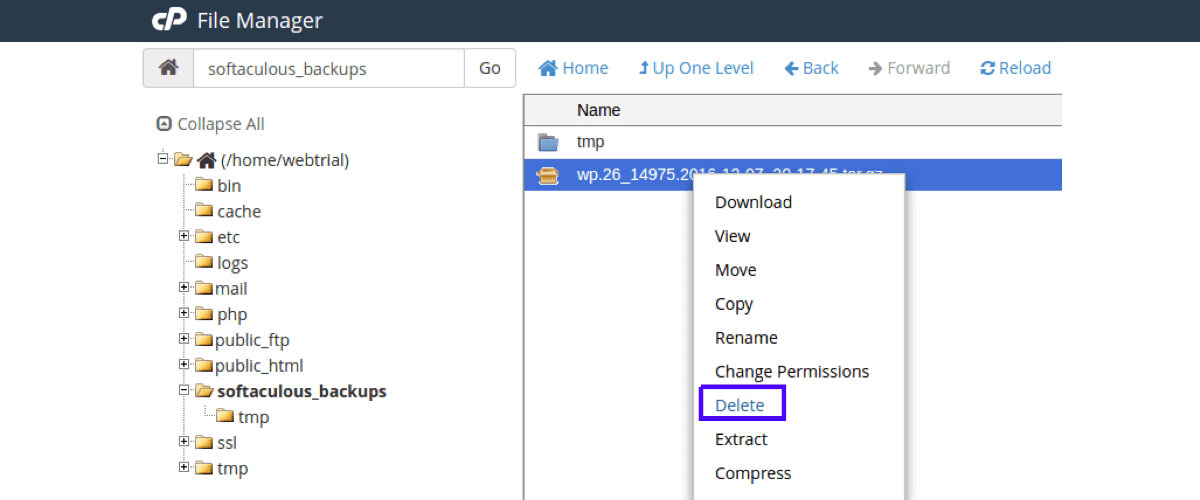
Solution 1 – Delete Old Backup Files
Backups are important but having too many backup files will just use a lot of space. Also, the older backups are not much useful. So, it’s always better to delete them.
For that, you will have to visit the “Disk usage” option located in the files section.

Click on it and you will be able to view the entire disk usage. You can now sort the folders by size to get the proper idea about the usage.
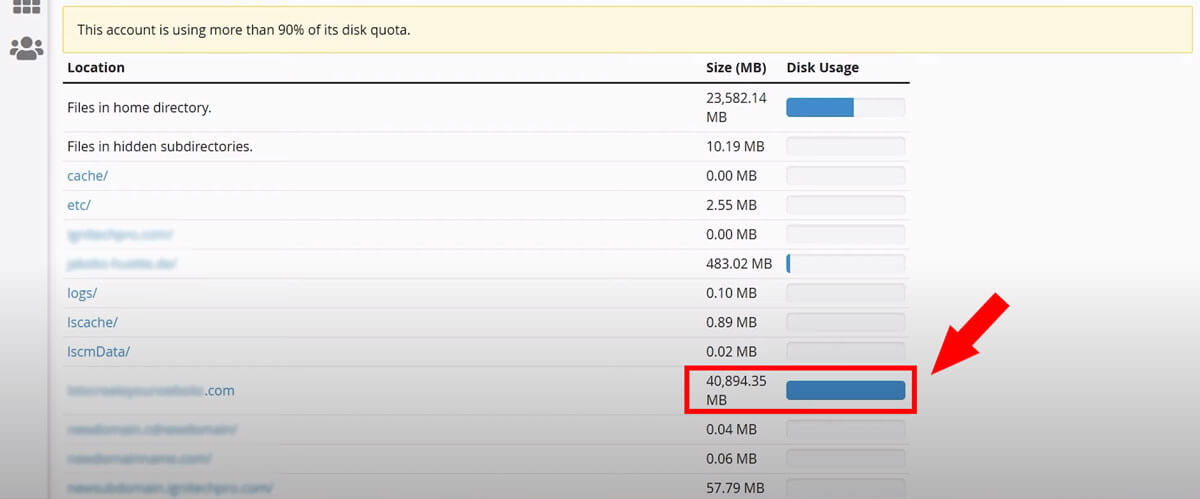
You will which directory uses the most storage. You can visit the backup directory and delete the old backups from there.
Now, if you are using any plugin for the backups, you can also remove the backups from there.
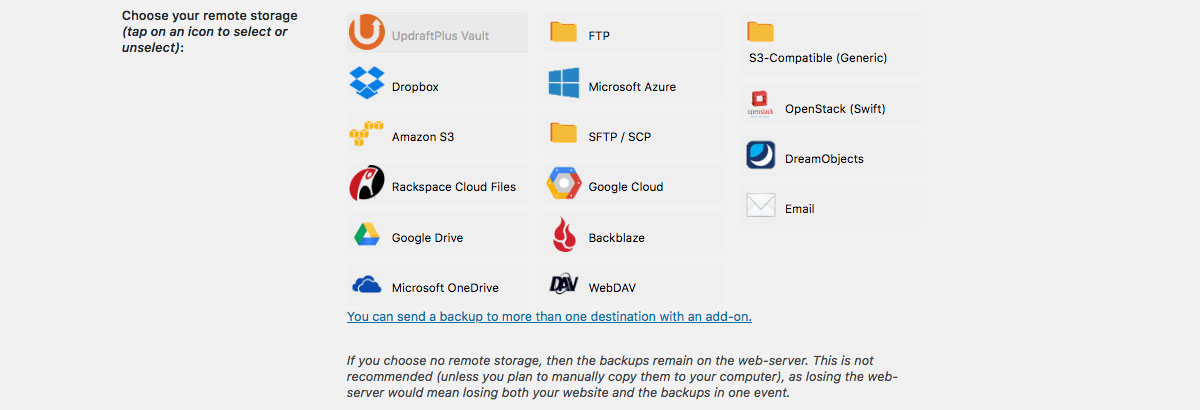
In this way, you don’t need to worry about backups. The backups will be stored in the cloud and you can save the disk space in your server.
Solution 2 – Increase WordPress Storage Quota
This is yet another common issue that people are facing. This only applies if you are using WordPress multi-site feature.
One of my customers had upgraded to WordPress multi-site network installation. Now, when he tried to add a new image to one of the websites, it showed the error of disk quota exceeded.
The exact error was “Sorry, you have used all of your storage quota of 10 MB.”
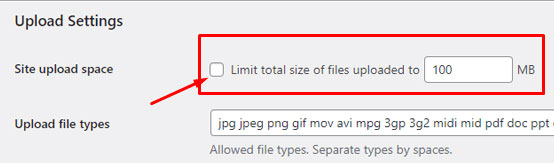
There is a setting in WordPress multisite that allows you to limit the disk usage per site. So, if you have enabled that setting, it might show that the disk quota is full.
To fix this, I headed over to My Sites >> Network Admin >> Select Settings >> Network Settings.
You will see “site upload space” there. You can either increase the space or you can remove the limit by unchecking the box.
Solution 3 – Clean Trash Folder
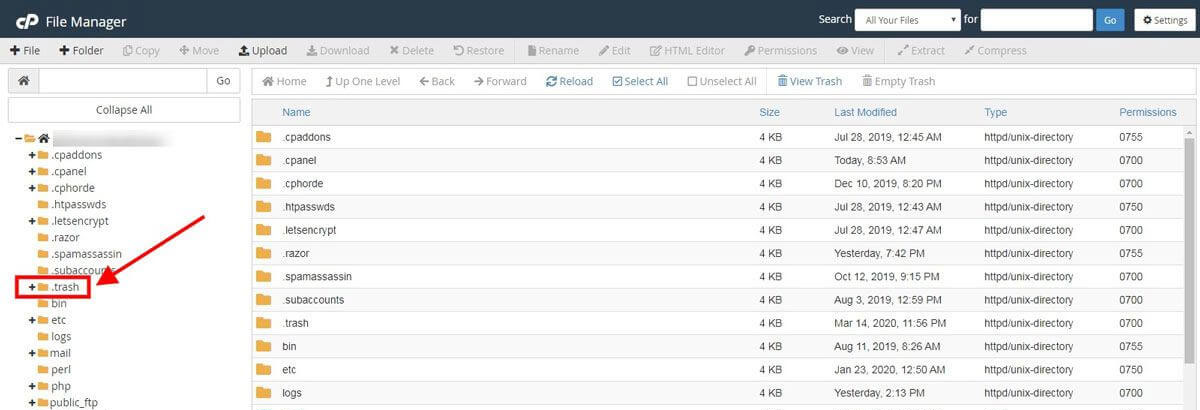
Once we move the useless files to trash, we think it’s deleted forever. However, it’s still using your server’s disk space. If you have recently deleted a lot of files, they might have ended up in the trash. You will also have to clear your trash folder.
There is a direct folder for trash in the cPanel. You can click on that folder and delete all the files.
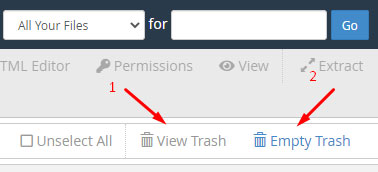
You can also click on “View trash” and then click on “Empty trash”.
Clean Staging or testing environments
The next thing you need to do is clear the staging environment. If you have just developed your website, you might have used a staging site or development site. You can remove that site which will clear some space. Make sure you remove all the files.
Once you delete the staging environment, it’s recommended to clean the trash again as the deleted files will land in the trash.
Talking about deleting things, there is one more thing that you will have to delete.
Solution 4 – Delete unused media files
People often forget about the media files. Media files are the reasons why your disk quota exceeded in no time. If you are using a premium theme, there are good chances that you have imported the demo.
The demo content will have a lot of images that you are not using. It’s a wise decision to delete all these files if you are no longer using them.
Don’t worry, you don’t need to delete all these files manually. Instead, you can delete it all by using a plugin.
The plugin that we are going to use here is Media Cleaner. The plugin allows you to clean all the media files with just a few clicks.
At first, you will have to run the scan. You can click on “Content” and check that box.
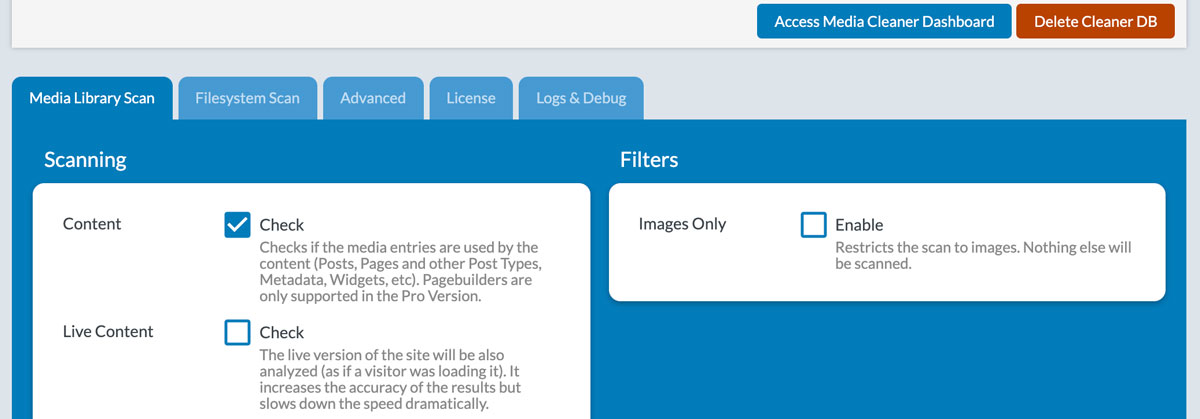
Thereafter, you can start the scan.
It will give you a bunch of media files that are not in use. You can either select them manually or you can select all the media files.
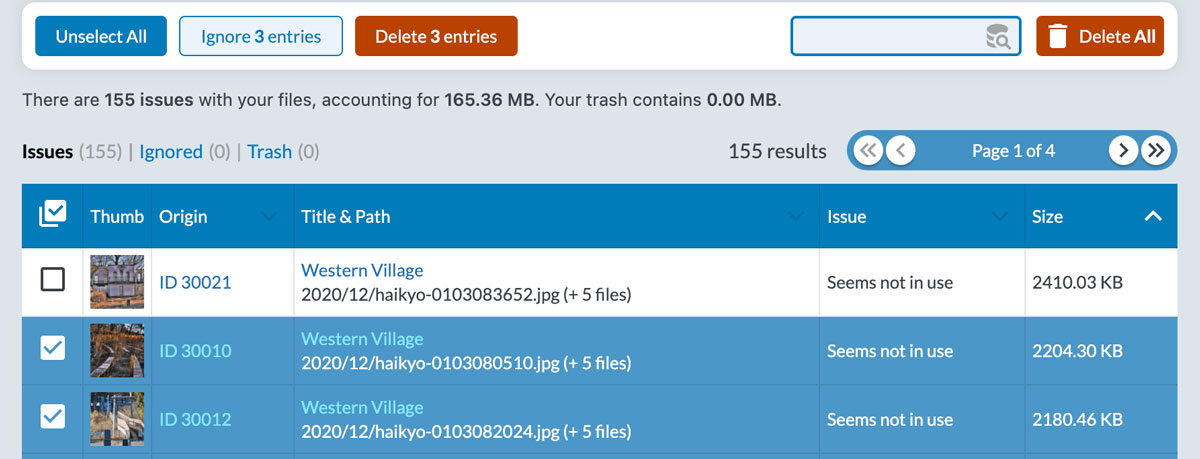
Once you have selected the media files, you can click on “Delete entries” and that’s it. It will then delete all the files.
YouTube offers unlisted video features.
With this, you can only show the video to the people who come to your website.
In the same way, if you have PDFs and other files, you can host them at someplace else, like your Google Drive.
Solution 5 – Delete Useless Themes and Plugins
The “deactivate” button in WordPress is pretty useful as it allows you to stop using the themes and plugins that you don’t need. However, people often just deactivate the plugins that they don’t need.
When you deactivate a plugin, the files are still stored in your server. So, it’s better to delete the files rather than keep them.
In this step, you will have to delete all the useless themes and plugins. Most people will also have the default WordPress themes intact on the website. You need to remove those themes as well.
Once you “delete” all the useless plugins and themes, you will have a decent amount of space saved.
If you want to go a little further, you can also deactivate the unwanted plugin or decorative plugin. For instance, if there is a plugin that can change the scroll bar of your website, it’s better to deactivate and delete such plugins.
These plugins are not necessary for your website but are only there to make the website look better. In the same way, if you are using multiple page builders, you can create all the pages using just one-page builder.
Method #3: Contact the Hosting Support
If none of the above techniques is working, you can use this last technique. It’s where you will have to contact the host. You can ask them to increase the disk quota for your website. Many hosting companies put disk limits for specific websites. You can remove that by contacting the hosting company.
The best way is to share the entire problem with them. If the hosting support is great, they will surely help you with the best possible solution that you can work on.
You can also request them to run a diagnosis in console mode. This will reveal any hidden files or directories that are taking too much space. They can help you fix the issue. While you are chatting with the support team, you can also ask them to clear the cache files for you. The cache files might reappear after a couple of days but it will give you enough time to figure things out.
Conclusion
To conclude, these are some of the things that you can try out to fix the full disk quota. If none of these works, you will either have to upgrade the plan of your hosting or go with another hosting provider.
If you want more space at an affordable price, you can go with Dreamhost. They provide unlimited disk space with no inodes limit. To get a quick overview, inodes mean the number of files, directories, and emails hosted in your server. So, in one way, it will stop you from adding more files to the server.
Therefore, if you are facing issues with disk quota, you should go with the hosting that doesn’t have an inode limit. Dreamhost is the best one for this.
On the other hand, if you need a VPS, you can go with Cloudways. It’s a managed hosting service that has many cloud providers that you can select in Cloudways.
FAQ
📌 How much disk space does a WordPress website need?
WordPress website generally needs roughly 1 GB of space considering that you have installed only a few plugins and less number of images.
📌 Is 1GB enough for WordPress?
For small WordPress websites where there are limited plugins and posts, 1 GB will be enough. If you have more images and plugins, you will need more space. Also, you can’t have more backups here.
📌 Can WordPress handle large sites?
WordPress can handle large sites as long as the features and functionalities that you want are available in WordPress. You might need a cloud server to host it.
Web Hosting Expert, Content Writer, SEO Consultant, and Web Developer with over 10 Years of Experience.
He has a passion for technology and has spent over a decade reviewing and testing web hosting companies to provide his readers with honest and accurate reviews of the companies he had experiences with.
Tommy loves helping people and has helped hundreds of people start their own successful sites.