Wondering if Namecheap Node JS hosting is possible? Does Namecheap support Node JS on their shared or VPS hosting?
This guide answers all the questions you have in your mind. It also covers how you can install Node JS on Namecheap hosting.
Let’s dive in.
Namecheap Node JS hosting
Yes, Namecheap supports Node JS hosting in all of their plans including shared hosting, VPS, and dedicated servers.
However, there are a few limitations on the versions. Currently, they only support Node JS versions which are 6.x, 8.x, 9.x, 10.x, 11.x, 12.x, and 14.x.
It’s not a big deal as most of the scripts are from one of these versions. For shared hosting, you can quickly use their one-click installer to install Node JS and run your app.
They also support doing the same in their VPS. However, the steps are a bit different. Let’s first cover how you can install Node JS on shared hosting. We will then move towards the step to install it on VPS.
As mentioned, Namecheap shared hosting also supports Node JS. Luckily, you can install Node JS on Namecheap with their one-click installer.
Here are the steps to do it.
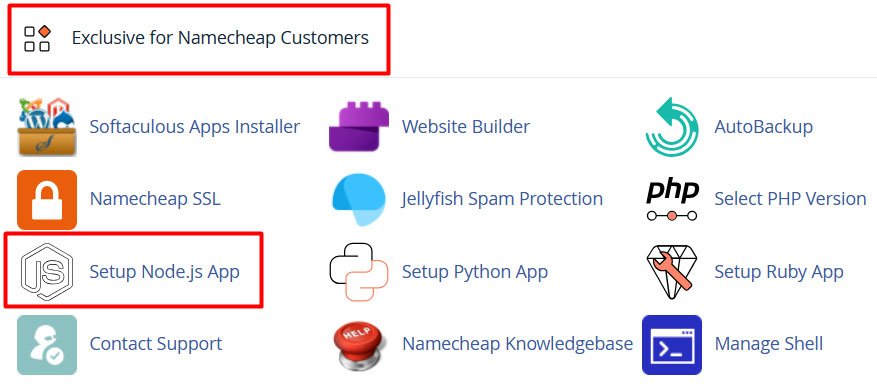
Step 1: Head over to “Setup NodeJS App”
Open your cPanel and click on “Setup Node JS App”. It’s in the “Exclusive for Namecheap customer” section.
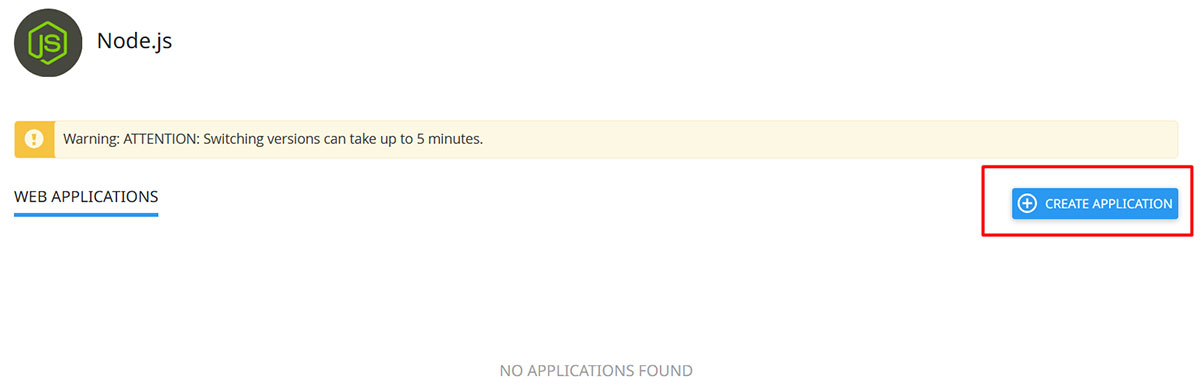
Step 2: Create your application
Now, you can click on the “Create application” button.
Step 3: Configure the app
In the next step, you will have a few fields where you can configure the server.
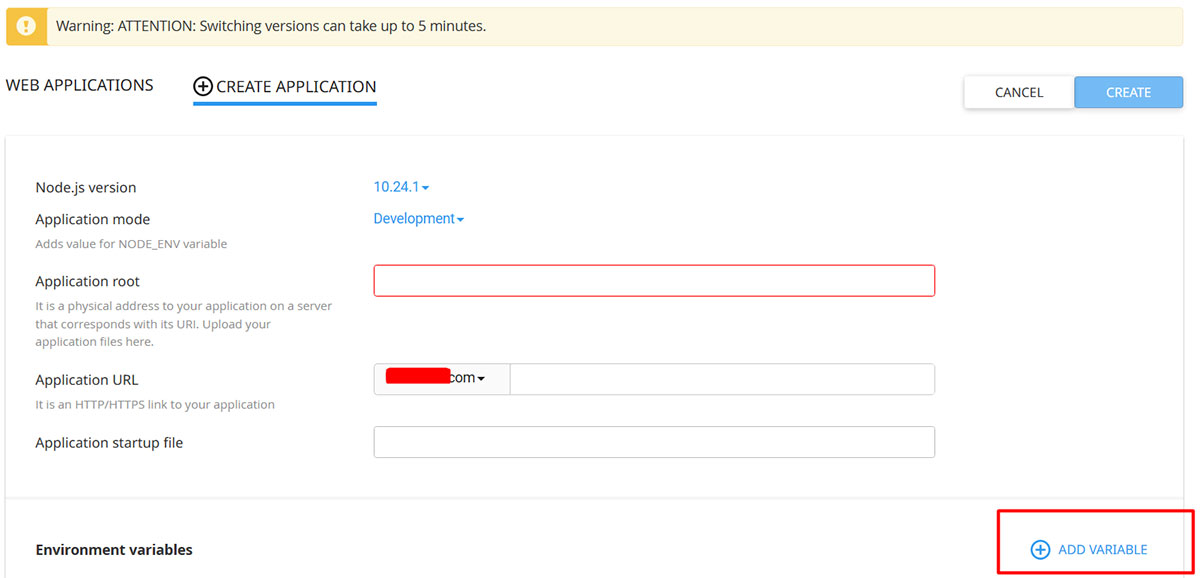
- Select the Node version from the dropdown menu.
- You can put your application in a development environment or production.
- Enter the root path of your application in the next field. This is the place where you upload your app.
- Enter the URL where you want to display your app,
- Add the startup file path (usually app.js).
- Add your environment variable if needed.
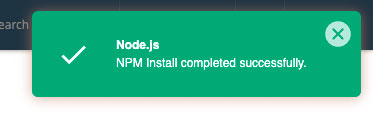
Step 4: Your Node app is ready to use
You will see the following success message after you hit the “Create” button on the top of the configuration form.
You can now manage your app from the “Setup Node JS” app option. The actions column allows you to pause, restart, edit, or delete your Node JS app.

How to deploy Node.js on Namecheap VPS?
You will have multiple options to deploy Node JS on Namecheap VPS. The first option is using cPanel. The 2nd option is with SSH.
We will cover both of these.
Option 1: Installing Node JS on Namecheap with cPanel
Namecheap is a cPanel-based hosting where you can configure the web server (Apache). So, you can also install NodeJS from the official source. However, it’s only available for version 16 or more.
For that reason, we will use Nodesource to install Node JS.
CentOS 7 doesn’t support Node JS newer than 16. Therefore, you will have to opt for another OS if you plan on using the latest versions of NodeJS.
We prefer using AlmaLinux 8 for Namecheap Node JS hosting. The steps we will see in this section are also for the same.
If you are using another operating system, you can skip this section and use SSH to install NodeJS.
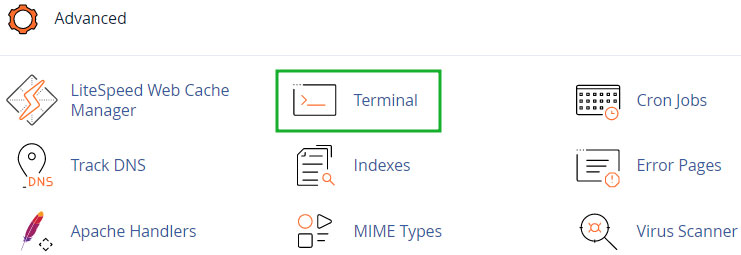
Step 1: Install the App
The first step is to head to your terminal inside the cPanel.
Enter the following command. It’s a pre-installation script provided by Nodesource.
curl -fsSL https://rpm.nodesource.com/setup_16.x | sudo bash –
If you wish to install another version of Node JS, you can add the version name in the above command. The above command installs the NodeJS 16 version.
You can change it to your preferred version number.
You can then proceed to install NodeJS and all other dependencies you might need to run your script.
sudo yum install -y nodejs gcc-c++ make
The above command also installs the optional dependencies. You can remove the last 2 words (gcc-c++ make) if you don’t wish to install the dependencies.
Step 2: Install package manager (optional)
If you wish to have the package manager, here are the two commands you need to run. The first command is to download the yarn from the URL and then install it.
curl -sL https://dl.yarnpkg.com/rpm/yarn.repo | sudo tee /etc/yum.repos.d/yarn.repo
sudo yum install yarn
Step 3: Check the version
Now, it’s time to see whether Node JS is installed on the server or not. For that, we will run a command to check the version of Node.
If the system shows us the version name, it means that Node JS is successfully installed in the system.
Here is the command to check it.
node –version
In the same way, if you did step 2, you can check if the package manager is installed or not.
npm –version
That’s it. If you see the version name, you have successfully installed Node JS and NPM. You can now proceed to install your Node JS script or application as per their documentation.
Option 2: Installing Node JS using SSH
The next way is to install NodeJS via SSH. You can either directly login to the server via SSH using your terminal or you can use a tool like PuTTy.
The tool is to be installed on your local computer.
Let’s see the steps to deploy the Node JS server using both of these ways.
Before we get started, it’s important to have the SSH details of your server. If you are unsure about any of them, you can always contact the support for help.
Step 1: Log in to the server via SSH
You can enter your server via SSH using several ways. If you are using Linux, you can simply open the terminal and type the following command.
ssh root@serverip -pPORT
You need to change the root with username and server IP with the VPS IP. In the same way, you can replace the port with your server port number.
Alternatively, for Windows users, you can use PuTTy. It’s a small software to connect to your server via SSH.
Here is the configuration page for PuTTy.
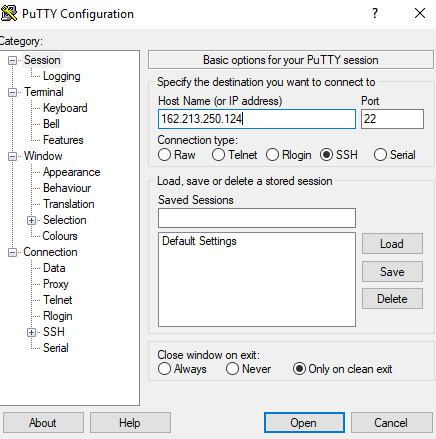
- Enter your server IP address in the hostname,
- The port number is where your server’s port goes. The default port for Namecheap VPS and the dedicated server is 22.
- Select SSH in the connection type.
Now, you can click on “Open” and it will give you a security warning. Click “OK” and you will be connected to your server via SSH.
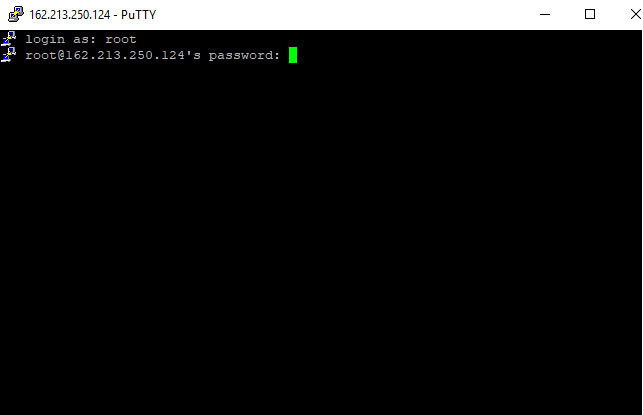
On the next page, you will get a terminal where you can enter the below commands to install Node.
Don’t forget to enter your username and password in the terminal.
Step 2: Install Node
Here are two commands you need to run. This is applicable if you are using Cent or Fedora OS.
sudo yum update
sudo yum install nodejs
If you are using a different OS such as Ubuntu or Debian, you can use the following two commands.
sudo apt update
sudo apt install nodejs
If you face any error, you can run the below command. This will install the download Node from the original URL. You can always change the version name to your preferred one.
curl -sL https://deb.nodesource.com/setup_16.x | sudo -E bash –
Step 3: Finalizing the installation
Your Node JS installation is completed now. You can type the following command to see if it’s working.
As mentioned before, it will show the Node version using which we can verify if Node is installed or not.
node -v
This will display the current version of Node. If you see a version name, it means your Node JS installation on Namecheap VPS is successful.
Conclusion
To summarize, Namecheap hosting supports Node JS for all their plans. The steps may vary depending on the type of hosting. It’s always preferred to use cPanel if possible.
Namecheap has a good name in customer support. So, if you face any issues anywhere during your Node JS installation, you can contact the live chat for help.
The team will help you out with all the requirements.
Did you face any issues? Let us know in the comment section which method you followed to install Node JS.
FAQ (Frequently Asked Questions)
Can I host Node JS on cPanel?
cPanel is the panel that controls your web server. You can use cPanel to install Node JS on your web server.
How to view Node JS logs in Namecheap?
You can use the Raw Access log option given inside the cPanel to view Node JS logs in Namecheap hosting.
Web Hosting Expert, Content Writer, SEO Consultant, and Web Developer with over 10 Years of Experience.
He has a passion for technology and has spent over a decade reviewing and testing web hosting companies to provide his readers with honest and accurate reviews of the companies he had experiences with.
Tommy loves helping people and has helped hundreds of people start their own successful sites.